Hands-Free Mac Setup Guide
With this setup, a Mac becomes fully operable without hands — combining head movement (Quha Zono X), voice commands (Blue Yeti mic + macOS Voice Control), and gesture tracking (Logitech Brio webcam + macOS Accessibility tools).
Step 1. Gather Your Equipment
You’ll need the following items or similar — these are the exact devices I use:
Mac Studio M2 Max (Apple)
Your main macOS computer. A MacBook or other Mac desktop can also be used.
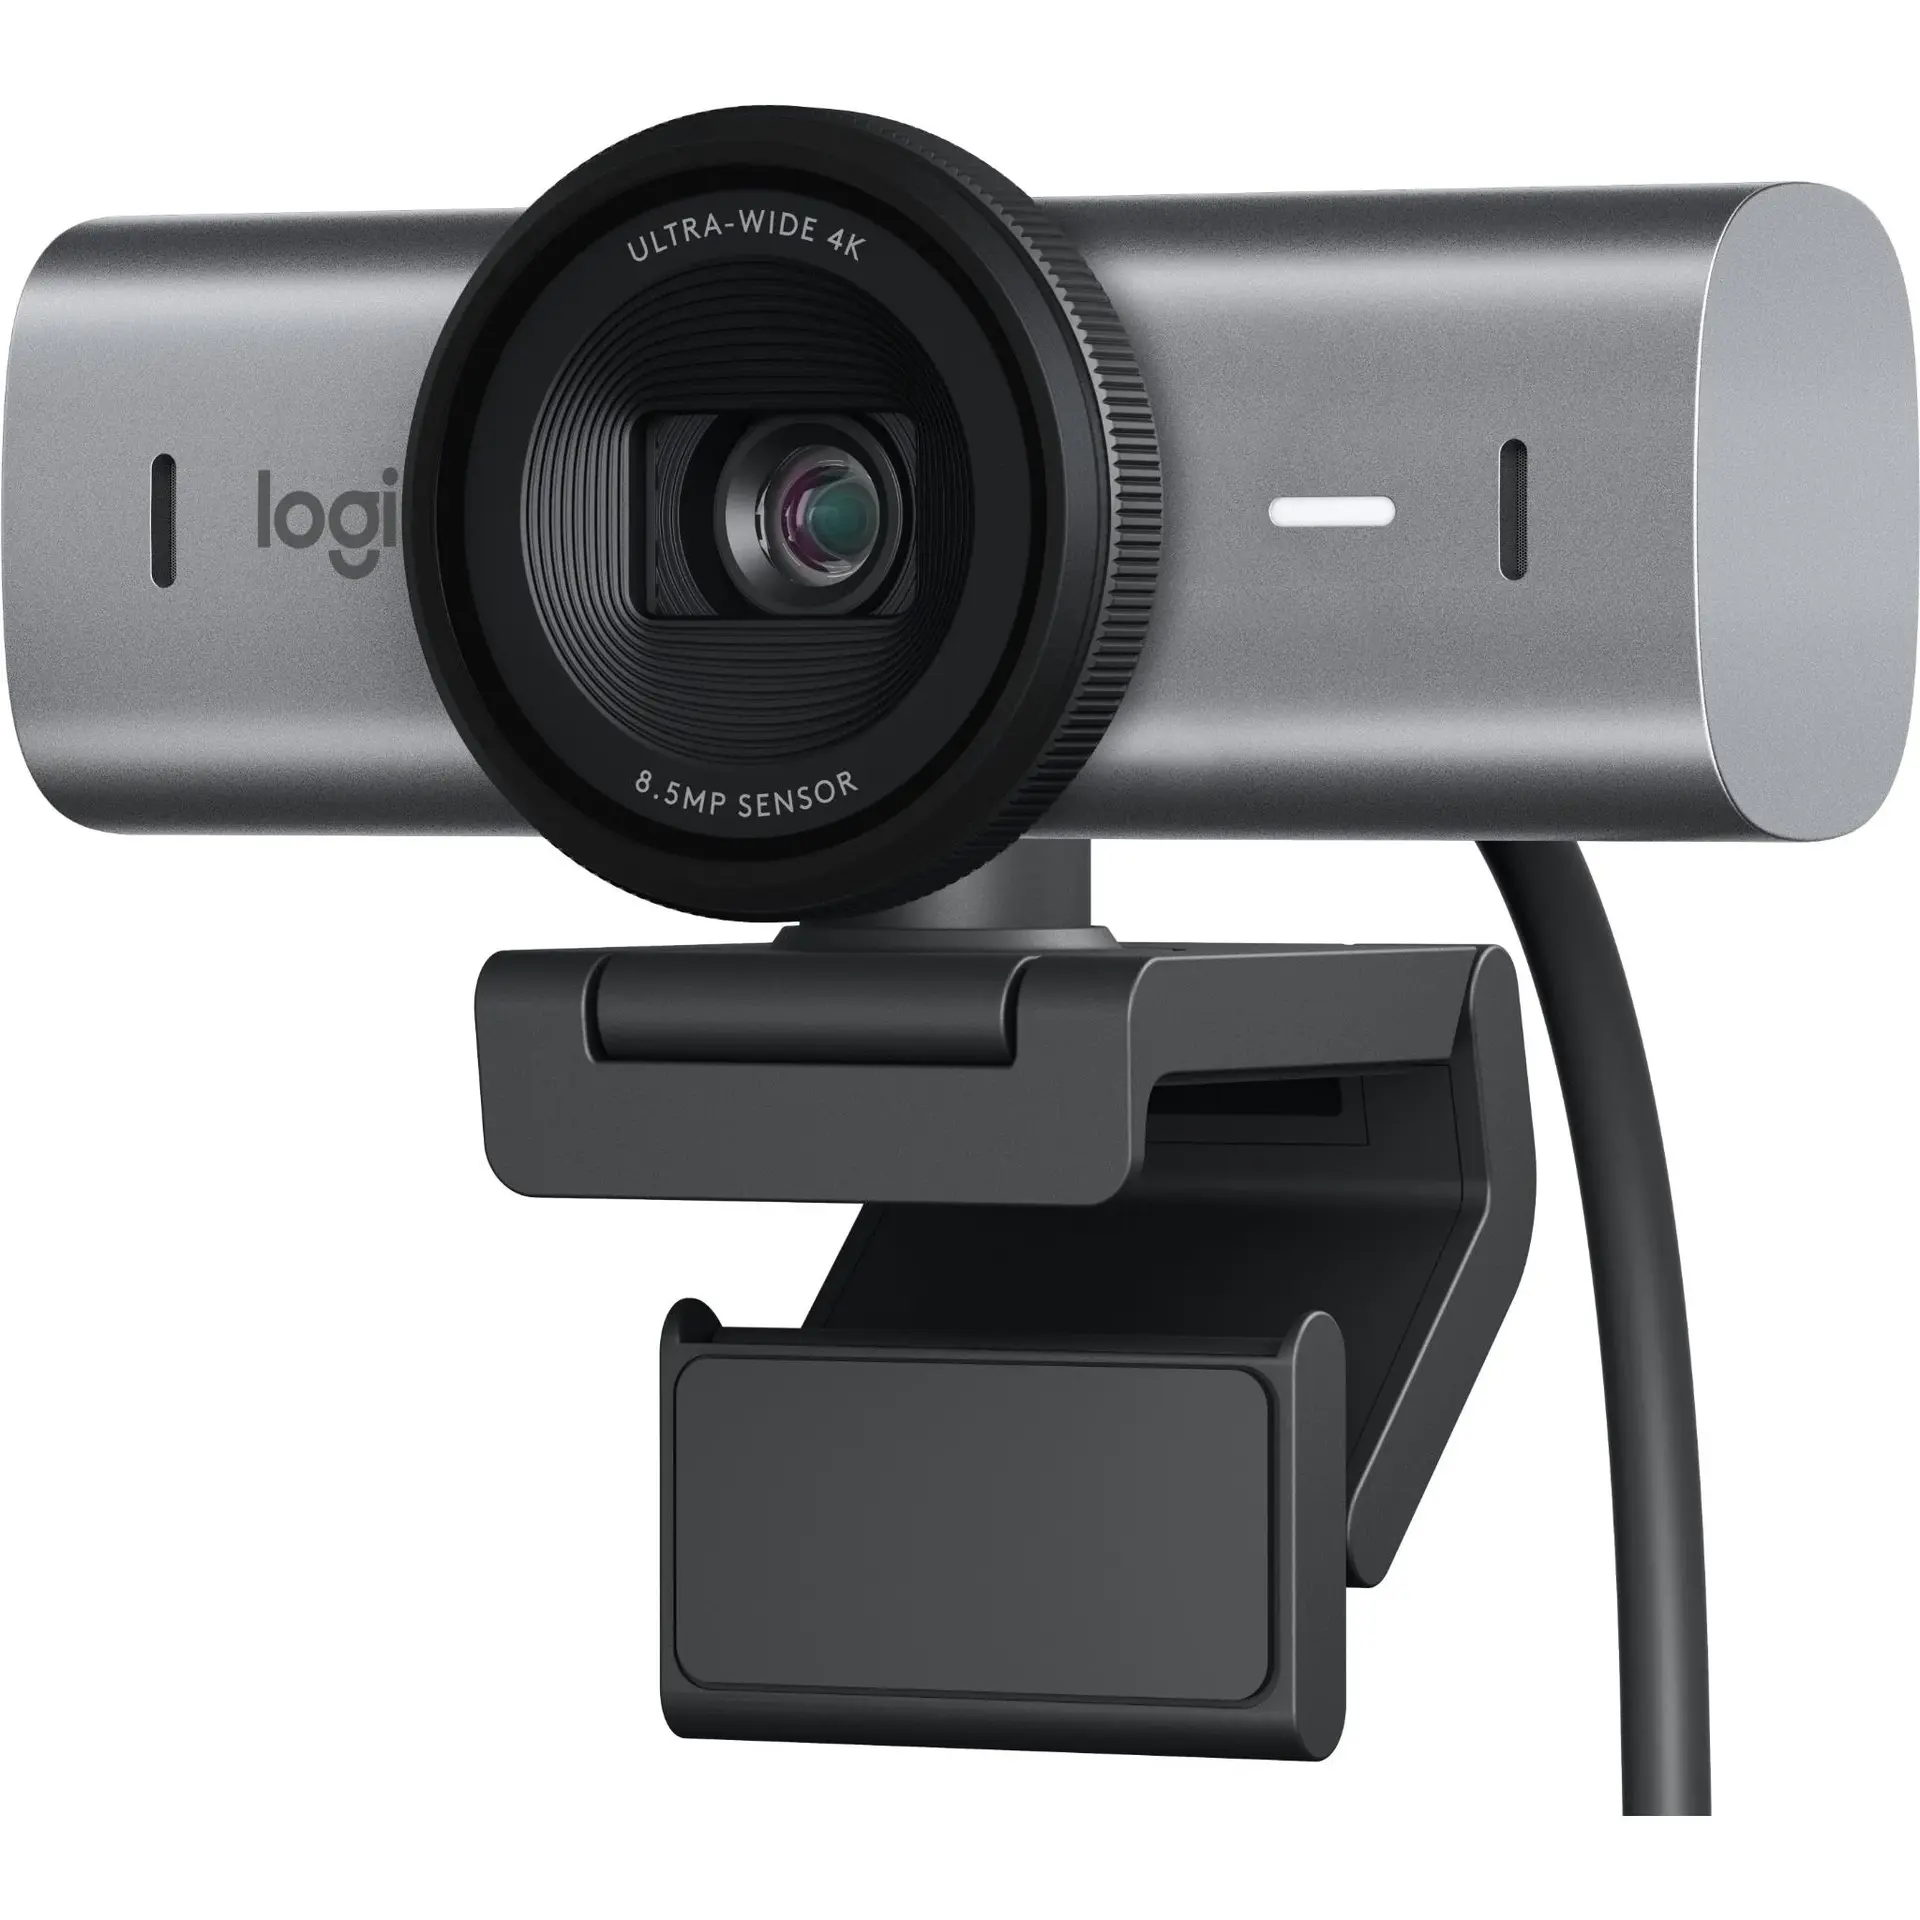
Webcam: Logitech Brio Ultra-HD 4K
High-definition webcam for precise facial gesture tracking. The Brio has a feature called RightSight that keeps your face centred even if you’re slightly off-centre, and automatically zooms so you don’t have to stay the same distance from your desk.
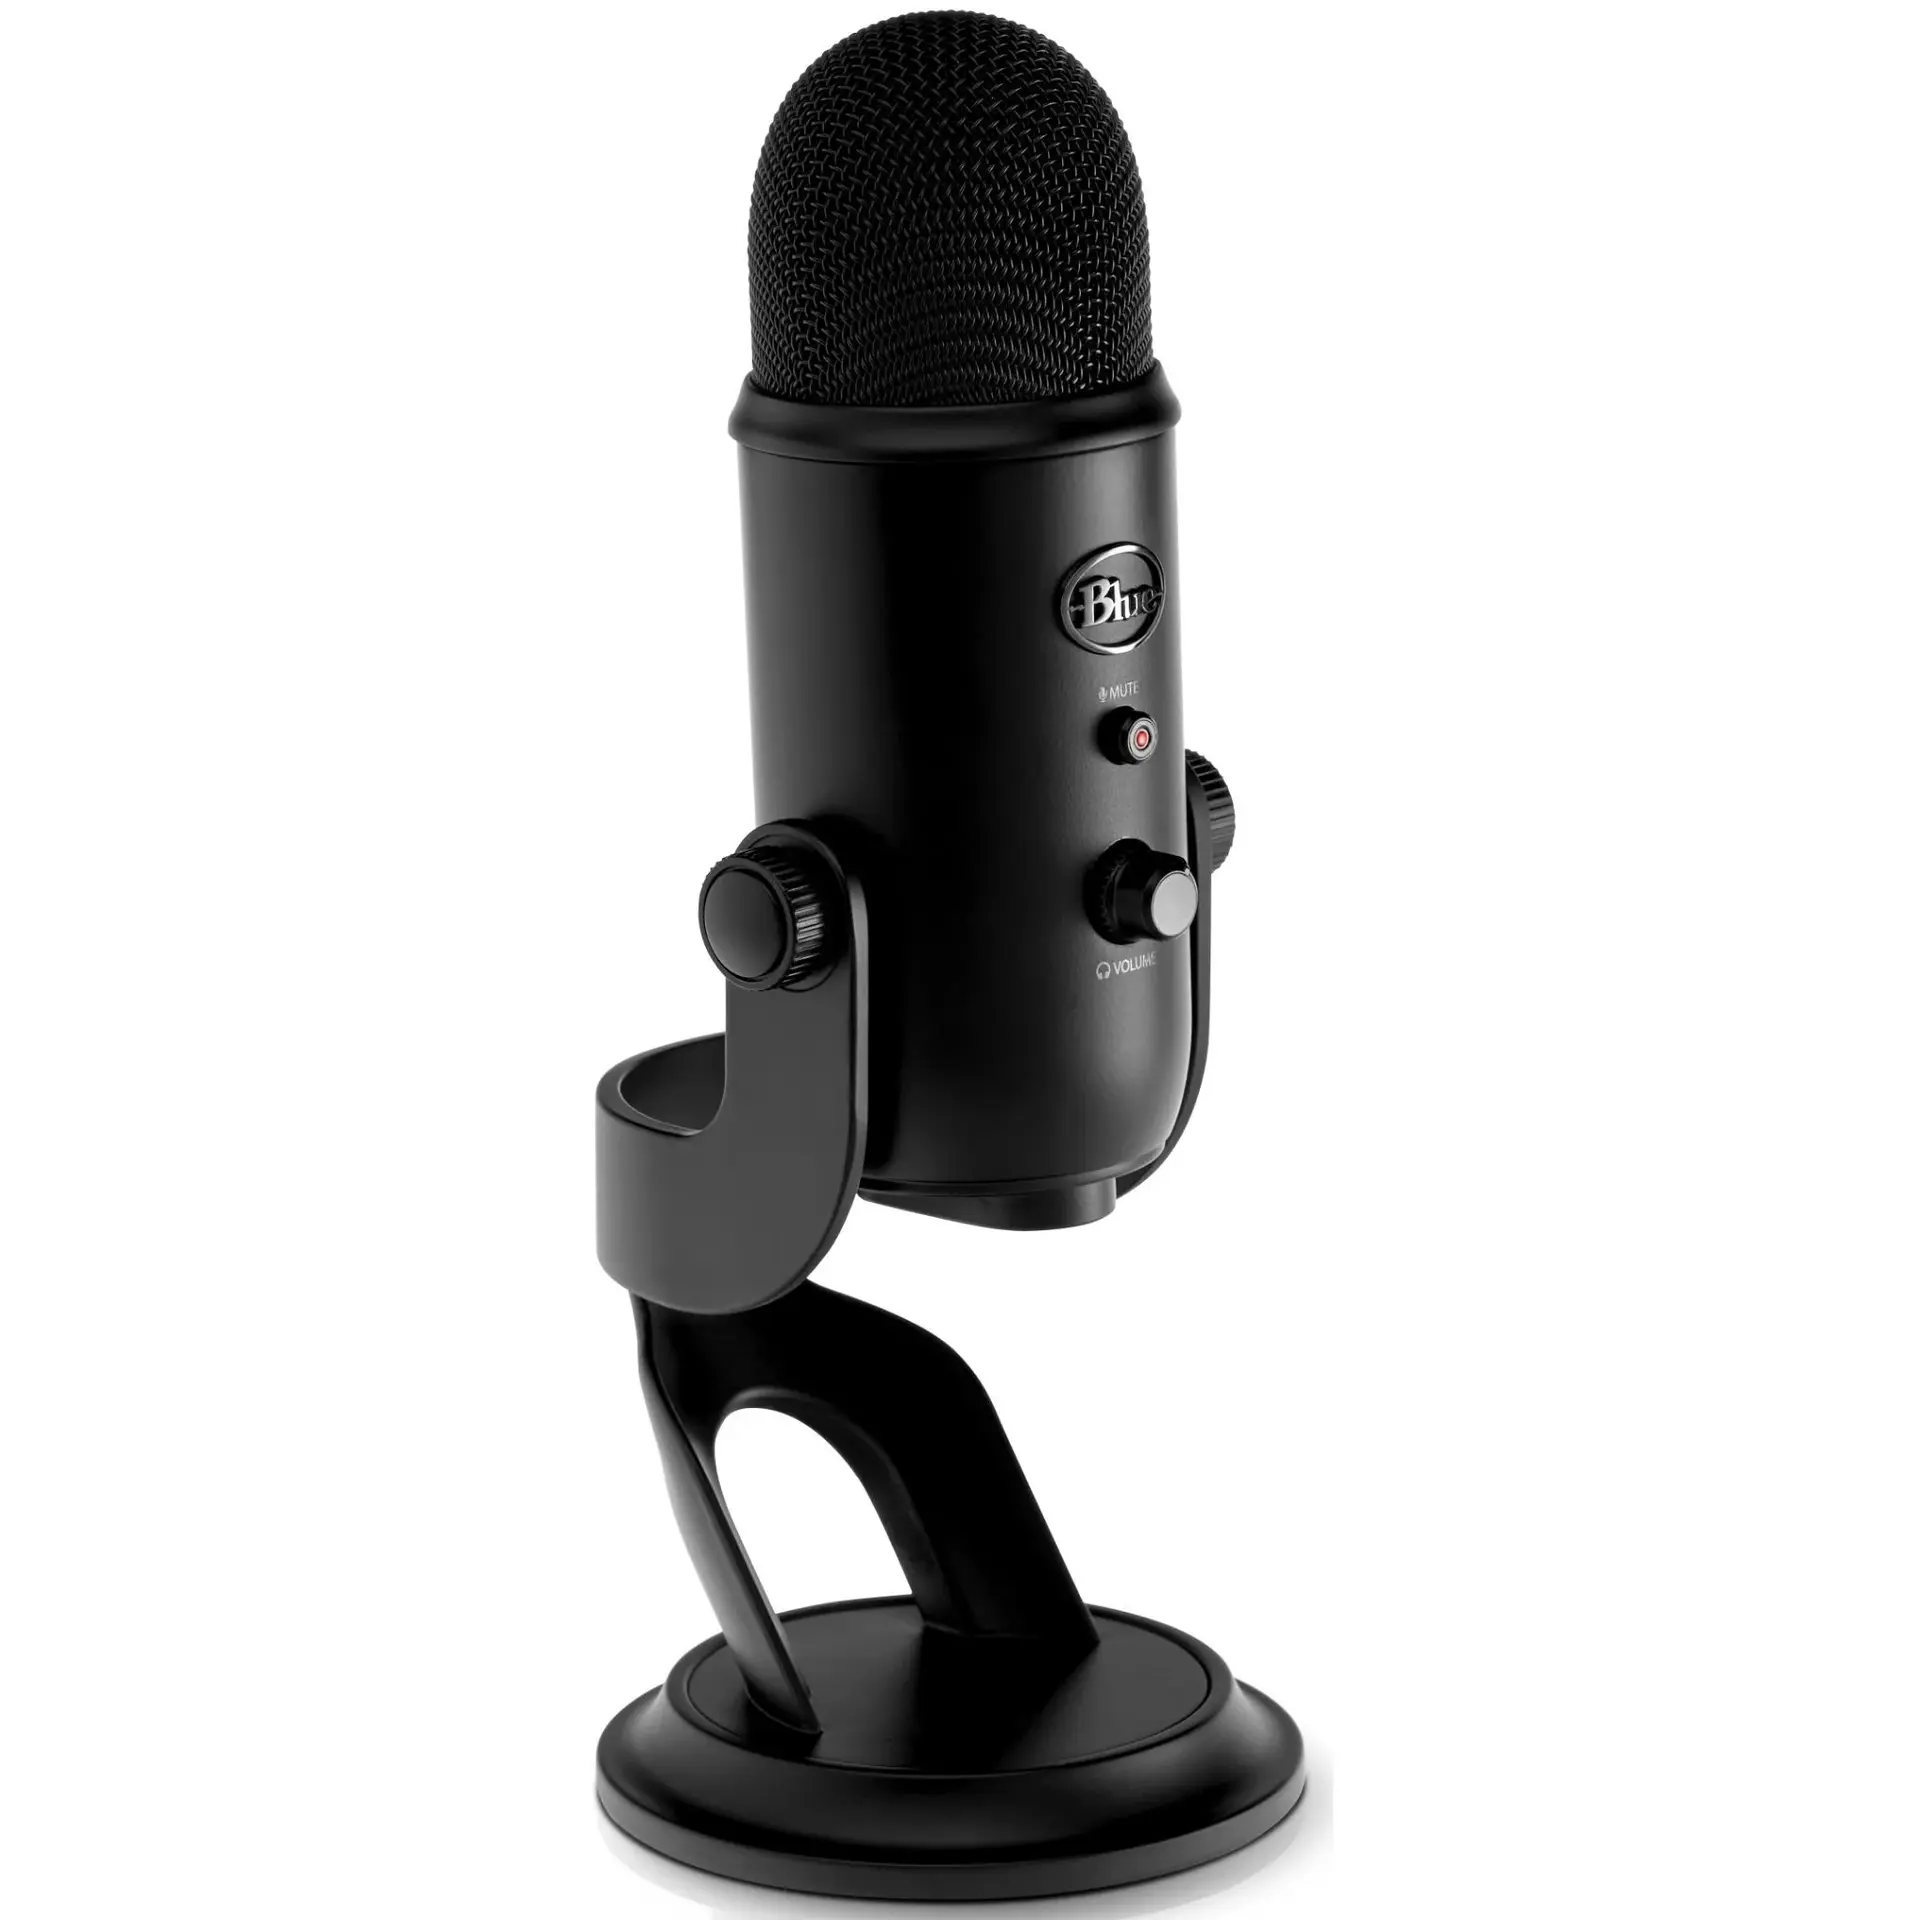
Microphone: Blue Yeti USB (Cardioid setting)
High-quality directional microphone for dictation and voice commands.
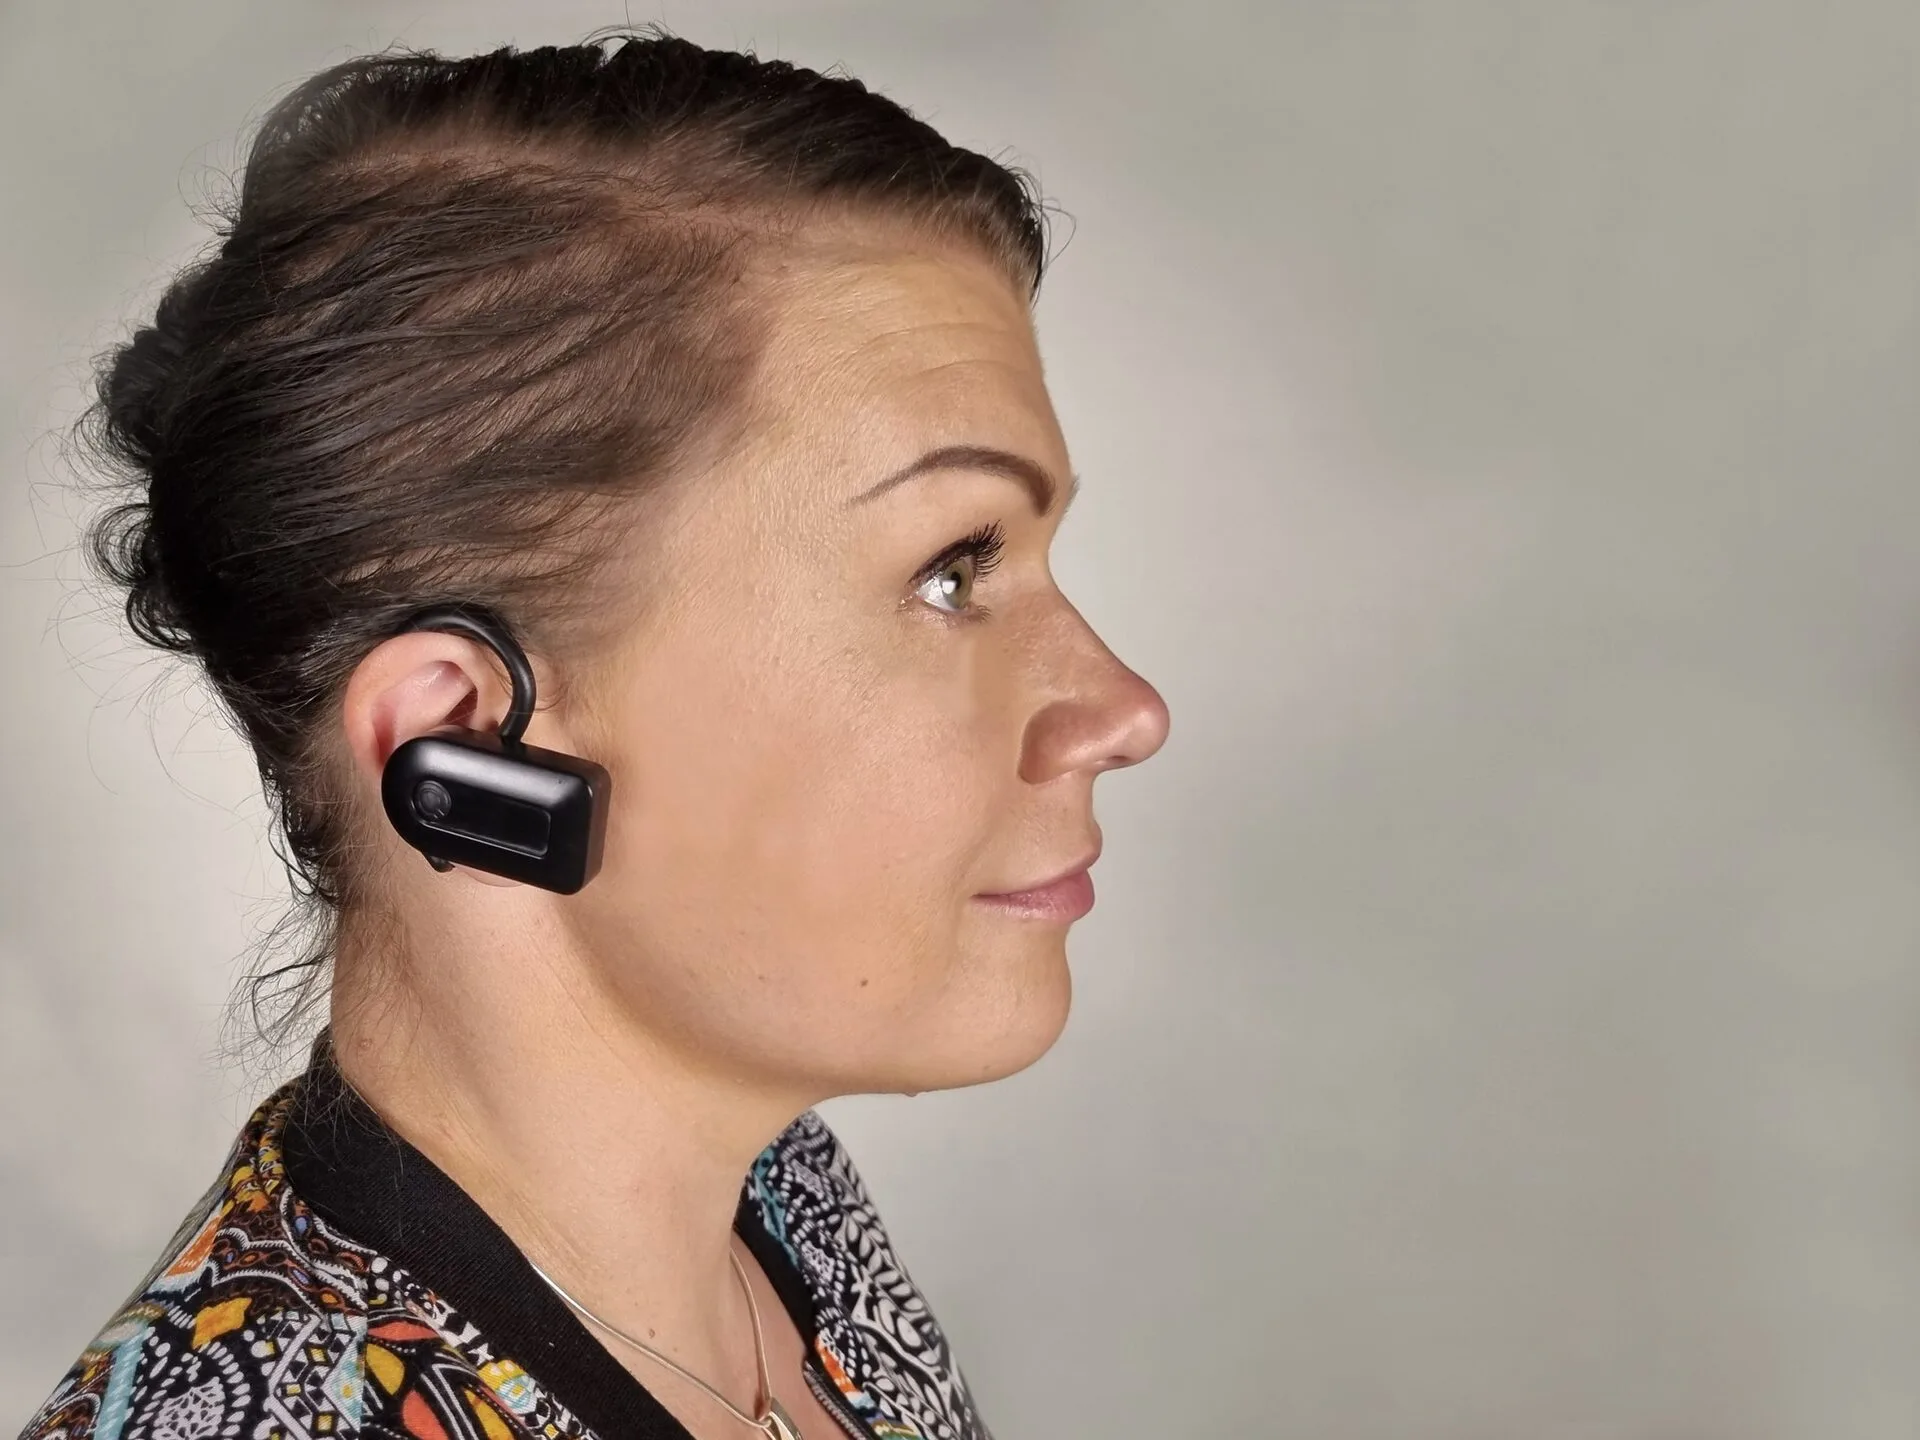
Gyroscopic Mouse: Quha Zono X Bluetooth Head Mouse
Lightweight ear-mounted mouse that translates head movements into pointer control.
Monitor (27–32", 4K recommended)
The size can be influenced by how much head movement you have — 27" minimum, 32" suggested. The extra pixels of 4K improve clarity, let you sit closer without seeing pixelation, and keep text sharp when you scale the display up on tired days. You also need room for the on-screen virtual keyboard alongside your documents.
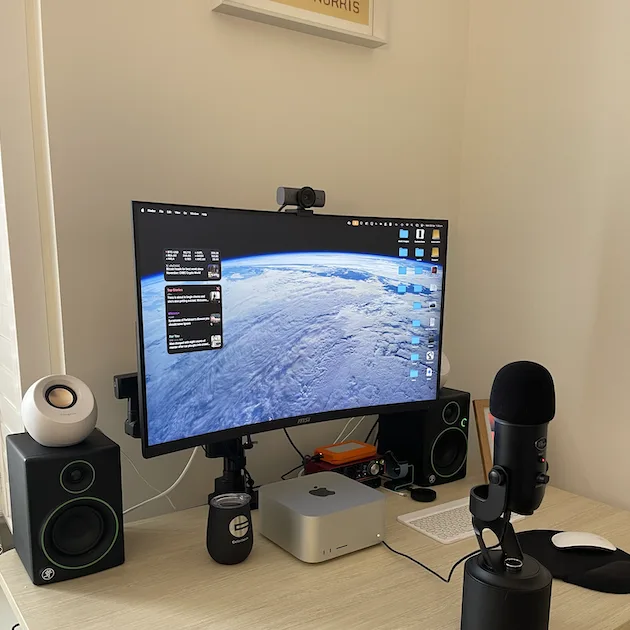
Here is a picture of my complete tech setup — a 32-inch curved-screen MSI monitor, Mac Studio, Logitech Brio webcam and Blue Yeti microphone.
Step 2. Set Up the Webcam (Logitech Brio)
- Plug the Brio into a USB port on your Mac Studio.
- Open System Settings → Privacy & Security → Camera.
- Allow access for apps like Safari, Chrome, Zoom, or any assistive tracking software.
- Position the webcam at eye level, ensuring your face is well lit for reliable tracking.
Step 3. Configure the Microphone (Blue Yeti)
- Connect the Blue Yeti via USB.
- Open System Settings → Sound → Input.
- Select Yeti USB Microphone from the list.
- Set the pattern switch on the mic to Cardioid (heart icon) for focused voice capture.
- Adjust the input level so your voice is clear without peaking.
Step 4. Prepare macOS Accessibility
- Go to System Settings → Accessibility.
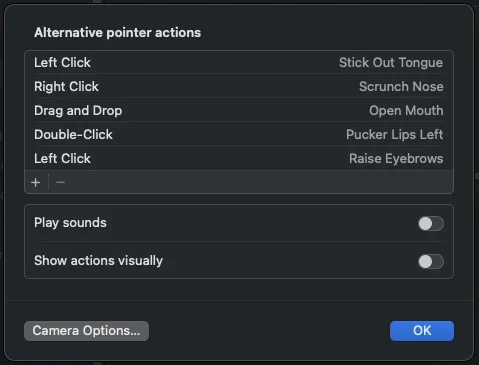
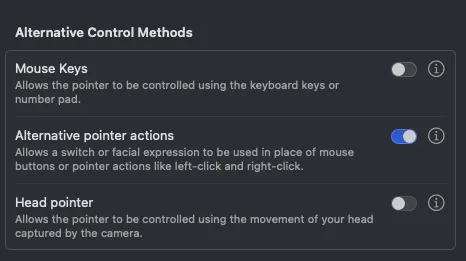
- Under Pointer Control, enable alternative pointer actions.
- Click the (i) icon to specify which facial gestures will trigger mouse actions.
- Under Voice Control, turn it on to dictate text and issue commands hands-free.
- Customize commands (e.g. “click,” “open Safari”) to match your workflow.
Step 5. Connect the Gyroscopic Mouse (Quha Zono X)
- Place the Quha Zono X over your ear.
- Hold the power button to turn it on.
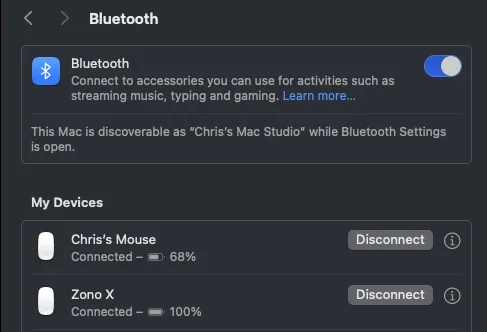
- On your Mac, go to System Settings → Bluetooth.
- Put the Quha Zono X in pairing mode, then select it from the device list.
- Once paired, gently move your head — your Mac cursor should move with you.
Step 6. Calibrate Pointer Control
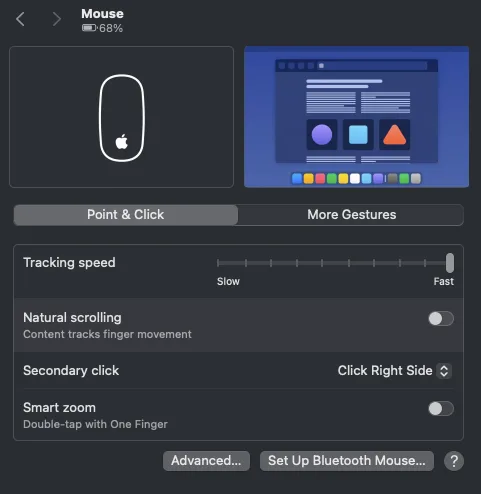
- Open System Settings → Mouse.
- Adjust Tracking Speed until pointer movement feels natural (I send it to maximum and it’s still barely enough).
- Test clicks (left, right, and double-click) using the facial gestures set up earlier.
- Try scrolling with subtle head movements.
- If you can’t move the pointer across the whole screen even at maximum tracking speed, you’ll need additional software — see AccessibilityMouse in the software section.
Step 7. Test & Fine Tune
- Open Safari and navigate to a webpage.
- Use your Quha Zono X to move the pointer, click links, open right-click menus, and scroll smoothly.
- Adjust webcam height/lighting if tracking isn’t consistent.
- Reposition the Blue Yeti mic as close to your face as possible for the best sound.
- Fine-tune Quha sensitivity for precise control without fatigue using AccessibilityMouse.
- Combine Voice Control with the Quha mouse for a fully hands-free experience.
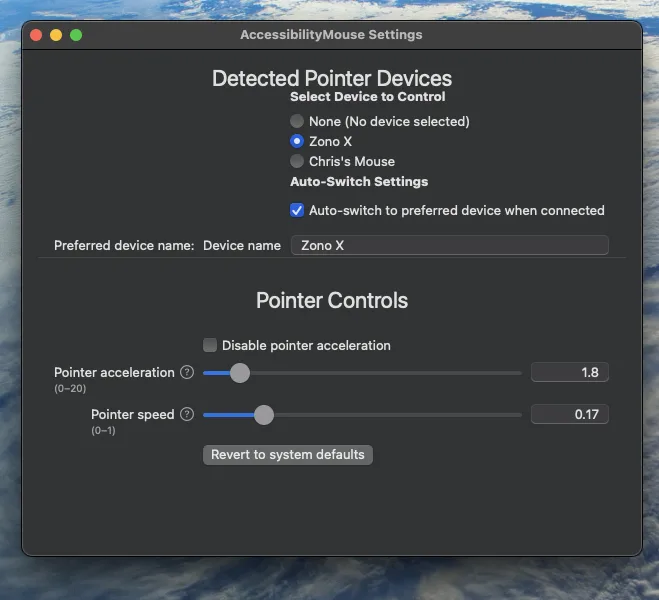
Step 8. Fine Tune Your Settings
- Open the mouse accuracy tester.
- Run several rounds of testing to get your average results.
- If you’re not scoring above 80% accuracy, lower the pointer speed and consider increasing acceleration by 0.1.
- Play with the settings until you can reliably hit the centre of the target with greater than 80% accuracy.
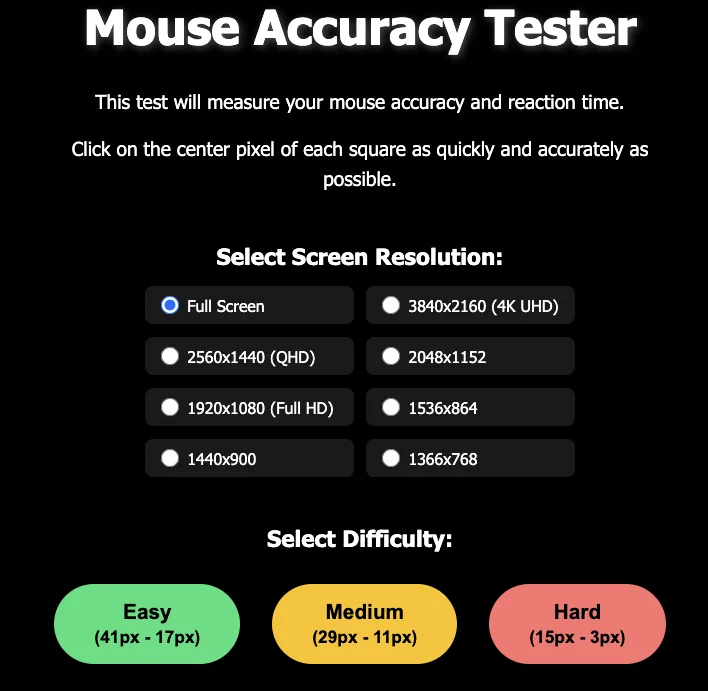
Watch it in action
My Tech Setup
A quick run-through of all the technology I use to control my computer hands-free.
Setting Up AccessibilityMouse
Downloading and setting up AccessibilityMouse to improve the speed and accuracy of your gyroscopic head mouse, trackball, etc.
Fixing Mouse Accuracy
How I use my gyroscopic mouse to control the computer, and how I improve its speed and accuracy.